![[The Talking Machine Forum - For All Antique Phonographs & Recordings]](/styles/we_universal/theme/images/the_talking_machine_forum.png)

I do like a good challenge. This Cylophone cabinet came to me with a peculiar problem. The original shellac finish on the doors....and ONLY the doors....had pebbled up terribly. The remaining shellac finish on the cabinet was flat, showing typical light alligatoring, which would clean up just fine. In repairing this, there are several thoughts one must process:
A. How to remove the pebbling
1. Sanding?
2. Stripping?
B. How to maintain or obtain correct color to match the cabinet.
1. Wood dye?
2. Keep original color?
C. What type of finish to apply?
1. Re-flow the original shellac?
2. Shellac?
3. Lacquer?
Too many people resort to completely stripping the finish, and I can understand why. It's easy, and in most cases the entire cabinet will be stripped along with it. As you can see, this cabinet is a beautifully preserved (albeit very very dirty) original that was looked after, and mostly unmolested (aside from having its horn removed, and a hole drilled through the back to run speaker wire through (what were people thinking??). To the amateur or aspiring restorer, or even seasoned restorer....there is ALWAYS something to learn, and new skills to discover. Some skills find you by accident!
The doors themselves are flat. After talking to a few friends about how to tackle this, I decided to take the time consuming route of SANDING the pebbles off until I hit the flat original shellac finish below! I removed the original latch decoration (which came apart all by itself into 3 pieces that I would have to glue back together later on), and trim strip. 600 grit......too weak. 400 grit....too weak. 200 grit......still too weak! 100 grit.....pass..... I'm serious here. I used 60 grit garnet sandpaper and a a large rubber sanding block! This sandpaper cuts FAST and I compare the experience to using a backhoe to remove the frosting from a birthday cake. Too much pressure....and you break through the original finish down to the wood! So, a lot of CAREFUL passes with the sanding block exposed the finish underneath. I then carefully used 200 and 400 grit to spot-remove some of the alligator shadow.
As you see....there are some light areas where the sandpaper broke through the micro thin under-finish. Here's how I tackled that. Living dangerously, I took a paper towel and wetted it lightly with some denatured alcohol. Wiping from the center of the piece, towards the light areas, I was able to transfer some of the color and finish back to the weak spots. TAKES GUTS. I don't like mixing wood dye and having the fill-in color mismatch after finish is applied. I let the alcohol air dry, then gave a quick fixtive spray with satin sheen lacquer. Stay tuned......I have a ways to go on this one! BUT, look at the final pic.....compare with the other original door. Quite a difference. AND, most importantly, I didn't add wood dye....I retained the original color.
FOLLOW THE RESTORATION: Pebbled shellac on Cylophone cabinet
-
MicaMonster

- Victor III
- Posts: 845
- Joined: Sat Feb 28, 2009 12:52 pm
- Personal Text: Never Settled
- Location: Rochester, NY
- Contact:
FOLLOW THE RESTORATION: Pebbled shellac on Cylophone cabinet
- Attachments
-
-
-
-
-
-
-Antique Phonograph Reproducer Restorer-
http://www.EdisonDiamondDisc.com
Taming Orthophonics Daily!
http://www.EdisonDiamondDisc.com
Taming Orthophonics Daily!
-
MicaMonster
- Victor III
- Posts: 845
- Joined: Sat Feb 28, 2009 12:52 pm
- Personal Text: Never Settled
- Location: Rochester, NY
- Contact:
Re: FOLLOW THE RESTORATION: Pebbled shellac on Cylophone cab
While the gears turn in my head as to how to make these doors "look the part," I took some time to clean the cabinet up. Cleaning the top, sides, and eventually the drawer fronts. There are MANY MANY options out there when it comes to cleaning antique shellac finishes, and my opinions are all my own.
GOJO: it's a hand cleaner, and a rather powerful one. It does work well, if you work quickly. I have not had good luck with it on decals or heavily alligatored finishes......it makes the alligatoring worse because it's solvent action eats away at shellac.
All cleaners take away SOME finish...the old stuff on the very top of the coat.
KOTTON KLENSER: the king of cleaners. This stuff dissolves decal colors almost on contact, and kills the skin on your hands if used without gloves. VERY VERY powerful cleaner. Again, I have experienced the same increase in alligatoring, and DULLING of the finish in some instances because it is simply too strong.
So, here I come to my favorite cleaner of all time. The very expensive, and difficult to find product made by RAMAX: "New Life Furniture Masque.". This stuff is GREAT. Not just great...FABULOUS. It is a very powerful cleaner, BUT not so powerful as to destroy decals or worsen finishes if left on for prolonged periods of time. It works slowly and deliberately, as do I. It is buffered with orange oil, which also moisturizes the wood and keeps the "0000" steel wool "in check," if you decide to use it. A pleasure to work with, and I have found nothing else that surpasses it. The only thing it has going against it is price. It is priced by the pint, so that a gallon costs the same amount as the constituent amount of individual pints. I wish the company would sell In discount bulk.....because I would be buying it by the 2-gallon bucket. Instead I buy it in the little tubs.....same cost per ounce, and easier to schlep around the garage. So, there is my unpaid advertisement.
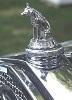
Before anybody asks: ...the car: it's an AMC Gremlin "Deluxe" from the year 2024.
I applied 5 light coats of Mohawk satin sheen lacquer to the doors, sanding with a 400 grit foam sanding block between coats. This stuff is one sheen level above "flat," and really requires no buffing or additional polish after it dries, especially in this case where I am trying to keep the shine muted to match the cabinet. In the final pic you can see how the left door turned out. Definitely better than before! There are other repairs that need to be done.....some veneer chips on the front, and that annoying hole drilled through the back....
GOJO: it's a hand cleaner, and a rather powerful one. It does work well, if you work quickly. I have not had good luck with it on decals or heavily alligatored finishes......it makes the alligatoring worse because it's solvent action eats away at shellac.
All cleaners take away SOME finish...the old stuff on the very top of the coat.
KOTTON KLENSER: the king of cleaners. This stuff dissolves decal colors almost on contact, and kills the skin on your hands if used without gloves. VERY VERY powerful cleaner. Again, I have experienced the same increase in alligatoring, and DULLING of the finish in some instances because it is simply too strong.
So, here I come to my favorite cleaner of all time. The very expensive, and difficult to find product made by RAMAX: "New Life Furniture Masque.". This stuff is GREAT. Not just great...FABULOUS. It is a very powerful cleaner, BUT not so powerful as to destroy decals or worsen finishes if left on for prolonged periods of time. It works slowly and deliberately, as do I. It is buffered with orange oil, which also moisturizes the wood and keeps the "0000" steel wool "in check," if you decide to use it. A pleasure to work with, and I have found nothing else that surpasses it. The only thing it has going against it is price. It is priced by the pint, so that a gallon costs the same amount as the constituent amount of individual pints. I wish the company would sell In discount bulk.....because I would be buying it by the 2-gallon bucket. Instead I buy it in the little tubs.....same cost per ounce, and easier to schlep around the garage. So, there is my unpaid advertisement.
Before anybody asks: ...the car: it's an AMC Gremlin "Deluxe" from the year 2024.
I applied 5 light coats of Mohawk satin sheen lacquer to the doors, sanding with a 400 grit foam sanding block between coats. This stuff is one sheen level above "flat," and really requires no buffing or additional polish after it dries, especially in this case where I am trying to keep the shine muted to match the cabinet. In the final pic you can see how the left door turned out. Definitely better than before! There are other repairs that need to be done.....some veneer chips on the front, and that annoying hole drilled through the back....
- Attachments
-
-
-
-
-
-
-Antique Phonograph Reproducer Restorer-
http://www.EdisonDiamondDisc.com
Taming Orthophonics Daily!
http://www.EdisonDiamondDisc.com
Taming Orthophonics Daily!
-
MicaMonster
- Victor III
- Posts: 845
- Joined: Sat Feb 28, 2009 12:52 pm
- Personal Text: Never Settled
- Location: Rochester, NY
- Contact:
Re: FOLLOW THE RESTORATION: Pebbled shellac on Cylophone cab
I promise.....LAST POST FOR TODAY. The thing is, I work on these things over the course of days, but don't really have time to post at the end of the work day.
Here is a chip on the front of the cabinet. One of my pet peeves is filling in with new veneer, coloring, then adding finish. In this example, I razored the chip area square, and filled in with a piece of original Victrola mahogany, retaining its original finish. The hairline gaps I fill in with resin, and then I clean the shellac chip as I would the rest of the cabinet!
Here is a chip on the front of the cabinet. One of my pet peeves is filling in with new veneer, coloring, then adding finish. In this example, I razored the chip area square, and filled in with a piece of original Victrola mahogany, retaining its original finish. The hairline gaps I fill in with resin, and then I clean the shellac chip as I would the rest of the cabinet!
- Attachments
-
-
-
-
-Antique Phonograph Reproducer Restorer-
http://www.EdisonDiamondDisc.com
Taming Orthophonics Daily!
http://www.EdisonDiamondDisc.com
Taming Orthophonics Daily!
-
HisMastersVoice
- Auxetophone
- Posts: 2587
- Joined: Wed Jan 14, 2009 5:01 am
Re: FOLLOW THE RESTORATION: Pebbled shellac on Cylophone cab
I second this, I use it exclusively after Wyatt turned me onto it a few years ago. It's awesome. And not difficult to find if you order it directly from the website like I do. At $20 per jar, it's worth the extra money in my opinion.MicaMonster wrote:So, here I come to my favorite cleaner of all time. The very expensive, and difficult to find product made by RAMAX: "New Life Furniture Masque.". This stuff is GREAT. Not just great...FABULOUS.
http://www.newlifewoodconditioners.com/ ... re-masque/
-
Garret
- Victor IV
- Posts: 1523
- Joined: Wed Jan 07, 2009 10:07 pm
- Location: Lille, France
Re: FOLLOW THE RESTORATION: Pebbled shellac on Cylophone cab
So glad to see another thread of this sort from the master. 
G.
G.
-
Phono-Phan
- Victor V
- Posts: 2474
- Joined: Fri Apr 06, 2012 9:38 pm
- Location: Plover, WI
Re: FOLLOW THE RESTORATION: Pebbled shellac on Cylophone cab
This cabinet is in the right hands to correct the finish issues. I still wonder why it is just on the front doors and not on the rest of the cabinet.
Ken
Ken
-
EarlH
- Victor III
- Posts: 816
- Joined: Thu Sep 25, 2014 4:25 pm
- Location: North Central Iowa
Re: FOLLOW THE RESTORATION: Pebbled shellac on Cylophone cab
Usually when a finish does something like that, it's because a harder finish was put over a softer one. And that could have happened at the factory if the undercoat wasn't completely dry before the next coat was laid on. Or someone gave it a coat of varnish years later and didn't clean the wax or some residue off before they gave it the tune-up. Or they didn't sand the old varnish some to give the fresh coat something to grab hold of.
Looks like it's coming along really nicely for you Wyatt. That's the main thing.
Looks like it's coming along really nicely for you Wyatt. That's the main thing.
-
Jwb88

- Victor II
- Posts: 401
- Joined: Mon Jul 27, 2015 10:41 pm
- Location: Riverside, California
Re: FOLLOW THE RESTORATION: Pebbled shellac on Cylophone cab
That is a gorgeous piece of furniture. I'm glad it didn't get painted by one of the shabby chic-ers, and also glad you didn't strip the whole thing like most would do. The matching and blending here is absolutely amazing. A+.
-
Curt A
- Victor Monarch Special
- Posts: 6426
- Joined: Fri Jul 09, 2010 8:32 pm
- Personal Text: Needle Tins are Addictive
- Location: Belmont, North Carolina
Re: FOLLOW THE RESTORATION: Pebbled shellac on Cylophone cab
Thanks... this is a great topic and came at a time when I am dealing with the same type of pebbling...
"The phonograph is not of any commercial value."
Thomas Alva Edison - Comment to his assistant, Samuel Insull.
"No one needs a Victrola XX, a Perfected Graphophone Type G, or whatever you call those noisy things."
My Wife
Thomas Alva Edison - Comment to his assistant, Samuel Insull.
"No one needs a Victrola XX, a Perfected Graphophone Type G, or whatever you call those noisy things."
My Wife
-
MicaMonster
- Victor III
- Posts: 845
- Joined: Sat Feb 28, 2009 12:52 pm
- Personal Text: Never Settled
- Location: Rochester, NY
- Contact:
Re: FOLLOW THE RESTORATION: Pebbled shellac on Cylophone cab
Cabinet cleaned.
- Attachments
-
-
-
-Antique Phonograph Reproducer Restorer-
http://www.EdisonDiamondDisc.com
Taming Orthophonics Daily!
http://www.EdisonDiamondDisc.com
Taming Orthophonics Daily!