From Junk To Jewel, Circassian Victrola XVI

Discussions on Talking Machines & Accessories
User avatar
startgroove
Victor III
Posts: 887
Joined: Sat Apr 20, 2013 3:01 pm
Location: Coos Bay, Oregon

From Junk To Jewel, Circassian Victrola XVI

Post by startgroove »

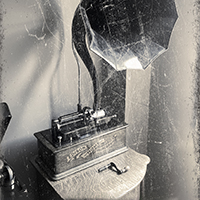
This is the "before" appearance.
IMG_6524 (1).JPG (94.67 KiB) Viewed 2154 times
Back in 2018, a Circassian Walnut Victrola XVI was discussed here on the Forum. (See: viewtopic.php?f=2&t=34202&hilit=circassian+victrola+XVI). Suffering from many customized changes and some veneer damage. To me it appeared as if it would be a significant and difficult restoration. I speculated that it might be a good Winter Project. So, I took a chance and acquired it. Upon taking possession at the Union Show, I began to have doubts about what could be done with it. In the end, I reassured myself that in the worst case, it could be a donor cabinet. Our helpful friend Jerry loaded it into his trailer for the trip to my home in Oregon, where it sat for a couple of years. The plan was to accumulate the missing parts, and when time and motivation coincided, start the process.
Finally, with the pandemic keeping me home and isolated, I had plenty of time to begin rebuilding the decrepit cabinet. The first thing to address was a thorough inspection and inventory of condition. It was worse than I thought. The sides had been re-veneered with paper backed walnut veneer. The pattern and type of walnut did not appeal to me. In general, it appeared to be fairly rough with a lot of issues, but the basic walnut chassis was fairly complete. I created a list of tasks to take on, and the discrepancy list grew to be a long one, including the following:
1. The top surface of the lid was stripped of both outer layers of veneer.
2. The remaining core of the top wood panel on the lid had been aggressively sanded so its routed edges were gone, leaving a sort of rounded off uneven edge all around.
3. All four front doors had a ¾ inch band of veneer added to the outside edges of the doors.
4. The four feet had been chopped off about one inch.
5. The two rear feet had been squared up by removing the bulging portions below the bottom cabinet line.
6. The original side veneer had been removed down to the core wood.
7. New veneer had been added to the sides, with no crossbanding. The new veneer did not appear to be Circassian Walnut.
8. All the original knobs had been replaced with white ceramic kitchen cabinet knobs.
9. Numerous hard parts were missing, including turntable, motor parts, the knobs, the castors, the albums and numerous small hardware.
10. All of the panels behind the album cubbies were missing.
11. There were numerous dings, gouges and chips in the wood, especially at the corners.
12. There was some water damage to the lower part of the cabinet. Most of the glue bonding the four corner and the sides had dissolved away, causing looseness and spreading at the joints.
13. The lower side moldings on each side were missing.

This will continue in the coming weeks or months (depending on how much time I can devote to it). Feel free to comment or critique. Cheers, Russie.
Attachments
The top panel had both layers of veneer gone and had been sanded so much that the cove edge was now rounded.
IMG_6534 (1).JPG (117.48 KiB) Viewed 2154 times
Front doors with a ¾ inch band of veneer around the edges.
victrola front doors.jpg (46.9 KiB) Viewed 2154 times
The three remaining feet were shortened by about an inch.
IMG_6528 (1).JPG (85.97 KiB) Viewed 2154 times
Moisture exposure to the lower rear cabinet had dissolved much of the glue at the seams.
IMG_6535.JPG (140.74 KiB) Viewed 2154 times
The right rear leg was broken off at the lower cabinet line and the lower side mouldings were missing.
IMG_6527 (1).JPG (86.21 KiB) Viewed 2154 times
Last edited by startgroove on Wed Feb 17, 2021 4:38 pm, edited 3 times in total.

User avatar
Django
Victor IV
Posts: 1693
Joined: Thu Apr 13, 2017 7:31 pm
Location: New Hampshire’s West Coast

Re: From Junk To Jewel, Circassian Victrola XVI

Post by Django »

If you know how to eat an elephant, this shouldn’t be a problem. I look forward to your progress. Best do luck.

User avatar
Phono-Phan
Victor V
Posts: 2476
Joined: Fri Apr 06, 2012 9:38 pm
Location: Plover, WI

Re: From Junk To Jewel, Circassian Victrola XVI

Post by Phono-Phan »

I really enjoy seeing efforts like this to save such a great phonograph. I can't wait to see your progress.

User avatar
dzavracky
Victor IV
Posts: 1558
Joined: Fri Oct 25, 2019 11:37 pm
Personal Text: college collector
Location: Knoxville Tennessee
Contact:

Re: From Junk To Jewel, Circassian Victrola XVI

Post by dzavracky »

Wow this is going to be quite the restoration! Best of luck with it.

David

User avatar
Curt A
Victor Monarch Special
Posts: 6429
Joined: Fri Jul 09, 2010 8:32 pm
Personal Text: Needle Tins are Addictive
Location: Belmont, North Carolina

Re: From Junk To Jewel, Circassian Victrola XVI

Post by Curt A »

Can't wait to see how you repair the legs... Good luck with the restoration.
"The phonograph† is not of any commercial value."
Thomas Alva Edison - Comment to his assistant, Samuel Insull.

"No one needs a Victrola XX, a Perfected Graphophone Type G, or whatever you call those noisy things."
My Wife

tomb
Victor IV
Posts: 1383
Joined: Sat Oct 24, 2015 10:46 pm
Location: riverside calif

Re: From Junk To Jewel, Circassian Victrola XVI

Post by tomb »

Good luck Keep us posted... Tom

User avatar
Mr Grumpy
Victor III
Posts: 831
Joined: Sat Nov 10, 2012 5:59 pm
Location: Ontario Canada

Re: From Junk To Jewel, Circassian Victrola XVI

Post by Mr Grumpy »

That's a hell of a project. Looking forward to seeing it done.
Vince
Youtube

User avatar
startgroove
Victor III
Posts: 887
Joined: Sat Apr 20, 2013 3:01 pm
Location: Coos Bay, Oregon

Re: From Junk To Jewel, Circassian Victrola XVI

Post by startgroove »

To back up a bit: From some previous postings in this forum about this machine, it was apparent to me that it was questionable whether this was an American Walnut or Circassian Walnut version. Reading photographs alone can sometimes be misleading, with some details that can only be read in person not being very obvious in the pictures. So, it was understandable that there was a question about which kind of walnut it was. Further, upon first seeing this machine in person, my initial feeling was that it could be American Walnut. There wasn’t enough time to study it beyond a quick viewing, as I was more interested in exploring the Union Show. I never saw it again until it arrived at my place. On the way home it hit me that I may have landed a sour beer, or at the very least something for Lori to have an "I told you so"!

And so, weeks later, sitting in my shop, I took a more detailed appraisal of the entire package. The lid, on the inside and on the outside skirts, appeared to be true Circassian Walnut. The sides of the cabinet had been re-veneered, so they were not useful in determining the original wood type. The front doors appeared to be Circassian Walnut with another type of walnut used to trim the edges. I was convinced the pullout shelf was Circassian Walnut, and the numbers on it matched the ones everywhere else on the cabinet. The main frame of the cabinet at first appeared to be some other wood that resembled walnut, but its’ grain was rather subdued. After wiping one front edge with a wet sponge, the grain popped out and it was more evident of being walnut with figuring. I compared that to the front edge of my other XVI which was American Walnut, and found the latter to be much plainer with no figuring. I concluded it was a Circassian Walnut main cabinet frame. That pleased Lori somewhat, but she did not seem convinced that this project would ever be completed. (My first reaction to that was "I'll show her!" Yet, Lori is rarely wrong, so I confirmed to myself that I would proceed with all the conviction and motivation that I could muster.)

With that conclusion, the next step was to find some Circassian Walnut veneer and some poplar crossbanding. Walnut comes in numerous varieties, and sometimes the names are different, but it is the same wood. The short list of veneers that I considered is, French Walnut, English Walnut, European Walnut, American Walnut, Claro Walnut and Circassian Walnut, among others. I ordered both Poplar and Circassian Walnut veneers, but was disappointed to find the Circassian Veneer that arrived to be too ugly upon first viewing it (confirming my point about judging appearance by viewing photographs). I wanted lots of contrast and figuring. Another order was made from a different source who had only a small amount, and that turned out to be a better looking group of veneer sheets. In fact it almost seemed too "busy". In addition, there was only enough to do the top of the lid and the front doors. The same vendor had some different pattern veneers from the same log, so I ordered four sheets of that to apply to the sides of the cabinet. My plan was to cover the sides with a pattern that was more conservative.

Waiting for the veneer to arrive, my first task was to repair the lid. It was needing much work to the top surface edges. Those edges had been sanded so aggressively that they were round off and the routed cove that was once there was missing entirely. I began by gluing strips of wood and veneer all around the edge to build up enough material to then sand flush and flat, and square up the four corners. Wow, that was hard. To maintain control, I did the sanding by hand with a small wood block wrapped in sandpaper. My wrists and arms felt like I had just flown South for the Winter! The first layer, or crossband layer, was then applied using the "Iron On" method. That was sanded in the same manner (after waiting several days for a decent rest of the arms).

Before applying the beauty layer of veneer to the top, a close up inspection of the “S” skirts on the lid revealed there were two off color blemishes that needed attention, one on the front and another on the right side. My first way of dealing with them was to use fine sand paper to see if they could be lightened. Upon sanding I found that the blemishes were actually sanded through areas. (Yep, I actually kept sanding on one of them thinking the blemish would eventually disappear, but it only got bigger). Okay then, a new layer of veneer was to be added. All four sides had to be done in order to match the color and grain of each to each other, and to the top surface of the lid. That being completed, it was time to cut a new cove around the perimeter of the very top of the lid. A mill came in handy to cut a perfect and square edge in that area. That being done, two symmetrical pieces of the last veneer layer were "bookmatched" and layed in on the top surface of the lid, using the "Iron On" method. A final block sanding starting with 100 grit and ending with 220, and then wet 400, finished off the prep process. It was then pore filled and stained with natural Watco Oil. Two weeks later, another wet sanding with 400 soaked in Watco Oil and put aside to cure. The last two pictures show how the appearance is.

So, I invited Lori to view the results and explained this was how the rest of the cabinet will look. With a wonderful smile on her face she said she was going to love this one and her final comment was "I hope we keep this one!".

The next addition to this thread will detail the repairs to the doors. Russie.
PS, Look carefully to see the Monkey, the Alien and the Sea Sting Ray! (It might help to have some of your favored beverage or drug beforehand!)
Attachments
The Top Surface Of The Lid After The Poplar Crossband Layer Is Laid Down.
IMG_6583.JPG (79.21 KiB) Viewed 1852 times
On The Mill, The New Cove Edge Is Cut All On All Four Sides.
IMG_6584.JPG (86.53 KiB) Viewed 1852 times
The Top Surface Of The Lid After New Veneer Applied, Sanded, Pore Filled And Stained.
IMG_6803.JPG (100.85 KiB) Viewed 1852 times
Another View Of The Stained Top Surface Of The Lid.  The "S" Skirts Have New Veneer.
Another View Of The Stained Top Surface Of The Lid. The "S" Skirts Have New Veneer.
IMG_6804.JPG (105.2 KiB) Viewed 1852 times
Last edited by startgroove on Thu Feb 25, 2021 11:14 am, edited 1 time in total.

User avatar
Django
Victor IV
Posts: 1693
Joined: Thu Apr 13, 2017 7:31 pm
Location: New Hampshire’s West Coast

Re: From Junk To Jewel, Circassian Victrola XVI

Post by Django »

Off to a great start. Keep it up.

need4art
Victor II
Posts: 444
Joined: Thu Jan 15, 2009 6:46 pm
Personal Text: A man is not a man who does not make the world a better place
Location: Arizona

Re: From Junk To Jewel, Circassian Victrola XVI

Post by need4art »

What great work, and wow that top looks great!

Abe

Post Reply