![[The Talking Machine Forum - For All Antique Phonographs & Recordings]](/styles/we_universal/theme/images/the_talking_machine_forum.png)

Columbia Grafonola Tabletop Barn Find and info on its restoration
-
Inigo

- Victor VI
- Posts: 3777
- Joined: Mon Dec 18, 2017 1:51 am
- Personal Text: Keep'em well oiled
- Location: Madrid, Spain
- Contact:
-
Herderz
- Victor II
- Posts: 283
- Joined: Sat Oct 10, 2020 6:39 pm
- Personal Text: Clockman
- Location: Elizabethtown, KY
Re: Columbia Grafonola Tabletop Barn Find and info on its restoration
You are welcome, I don't know how many more coats I will give it but I will probably end up with a satin finish. I do not think a high gross is what I want for my machine.
-
Duchesne

- Victor O
- Posts: 69
- Joined: Wed Jan 07, 2009 7:48 pm
- Location: Sharbot Lake, Ontario
Re: Columbia Grafonola Tabletop Barn Find and info on its restoration
Well, I'm rather jealous of your workshop - because you can turn out replacement pieces that I can't. However, I'm thrilled you brought this beauty back to life. I do like the book-matching you did for your new veneered top - not easy to pull off (no pun intended).
I LOVE how you painstakingly drew on the filler (why didn't I think of that one?) to further blend in these marks.
Oak is my favourite wood to work with; the smell when it ages, the look, especially quarter sawn. There is something magical about seeing the medullary rays as they play in the light when you move along the wood.
I also admire your patience to make before photos and to position the piece afterwards for after photos. Not easy to keep that in mind when showcasing one's work with everything else in life to deal with
If you don't mind, I'll probably save this thread as PDF for future reference
Cheers!
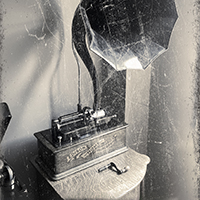
Oh! I do have access to a grafonola not totally unlike this one, but won't be able to get the hardware out just yet as it's in town but I thought these photos from worthpoint might help. There are two louvers and the wood does have a sort of lap on one that allows the other to nest. The hardware is a sort of half oval that then has two - well no I really don't know how to describe it. But I know they insert into the end of one end of the louvers
I LOVE how you painstakingly drew on the filler (why didn't I think of that one?) to further blend in these marks.
Oak is my favourite wood to work with; the smell when it ages, the look, especially quarter sawn. There is something magical about seeing the medullary rays as they play in the light when you move along the wood.
I also admire your patience to make before photos and to position the piece afterwards for after photos. Not easy to keep that in mind when showcasing one's work with everything else in life to deal with
If you don't mind, I'll probably save this thread as PDF for future reference
Cheers!
Oh! I do have access to a grafonola not totally unlike this one, but won't be able to get the hardware out just yet as it's in town but I thought these photos from worthpoint might help. There are two louvers and the wood does have a sort of lap on one that allows the other to nest. The hardware is a sort of half oval that then has two - well no I really don't know how to describe it. But I know they insert into the end of one end of the louvers
-
dzavracky
- Victor IV
- Posts: 1558
- Joined: Fri Oct 25, 2019 11:37 pm
- Personal Text: college collector
- Location: Knoxville Tennessee
- Contact:
Re: Columbia Grafonola Tabletop Barn Find and info on its restoration
My Columbia Nonpareil has those same louvers. When I get home tomorrow from class I can post some pictures. If I am remembering correctly, you are missing two pieces actually. They are two rectangular pieces that have a pivots with two feet (is that that right word for them?  ) that rest on the back of the louvers. The right piece is different from the left side because it has a small hole to attach that little rod into (the one you drew the arrow to). When you turn the knob on the side of the cabinet, it moves that rod up/down; which in turn makes the louvers open/close.
Hopefully this will make more sense when I post the pictures tomorrow.
David
Hopefully this will make more sense when I post the pictures tomorrow.
David
-
Curt A
- Victor Monarch Special
- Posts: 6426
- Joined: Fri Jul 09, 2010 8:32 pm
- Personal Text: Needle Tins are Addictive
- Location: Belmont, North Carolina
Re: Columbia Grafonola Tabletop Barn Find and info on its restoration
This has been a great tutorial for proper restoration techniques. I have used fake graining before, but was always apprehensive to use wood filler in place of actual wood inlays. What brand of filler did you use, and was it an epoxy filler? One thing you mentioned about using shellac, is very true - leave plenty of time between coats and don't brush back over it until thoroughly dry.
"The phonograph is not of any commercial value."
Thomas Alva Edison - Comment to his assistant, Samuel Insull.
"No one needs a Victrola XX, a Perfected Graphophone Type G, or whatever you call those noisy things."
My Wife
Thomas Alva Edison - Comment to his assistant, Samuel Insull.
"No one needs a Victrola XX, a Perfected Graphophone Type G, or whatever you call those noisy things."
My Wife
-
Herderz
- Victor II
- Posts: 283
- Joined: Sat Oct 10, 2020 6:39 pm
- Personal Text: Clockman
- Location: Elizabethtown, KY
Re: Columbia Grafonola Tabletop Barn Find and info on its restoration
Thanks guys, any info on the linkage will be helpful. Curt, I used Varathane sandable wood filler for the missing wood. It is water based and dry quickly. I used a quill pen with dark walnut stain to fake the grain.
I got my ¼" oak board to make my louvers and can see from many pics that I have researched that there is a cove back cut on the upper edge of the lower louver. I have not been able to see if there is a round over on the upper louver lower end. I would think there would have to be to get a nice tight seat and minimize the middle gap of the louvers.
Again any help would be much appreciated.
Last edited by Herderz on Mon Jul 26, 2021 3:54 pm, edited 1 time in total.
-
Herderz
- Victor II
- Posts: 283
- Joined: Sat Oct 10, 2020 6:39 pm
- Personal Text: Clockman
- Location: Elizabethtown, KY
Re: Columbia Grafonola Tabletop Barn Find and info on its restoration
I will use a router to do the cove back cut and then and round over "I think" then cut to length. Then veneer the tiger oak to both sides. That is the plan and will update as I go.
-
dzavracky
- Victor IV
- Posts: 1558
- Joined: Fri Oct 25, 2019 11:37 pm
- Personal Text: college collector
- Location: Knoxville Tennessee
- Contact:
Re: Columbia Grafonola Tabletop Barn Find and info on its restoration
Here are some pictures. Hopefully this helps! There is only one piece that actually moves the louvre... not two like I had said yesterday. On my cabinet, the two vertical pieces of trim are NOT glued into the cabinet. That way when the 4 screws are removed.. the louvres can be pulled out of the cabinet. I am not sure how it was done on yours though.
The top louvre has a small horizontal cut across the top where the bottom louvre sits in when closed.
David
The top louvre has a small horizontal cut across the top where the bottom louvre sits in when closed.
David
- Attachments
-
-
-
-
-
-
-
-
-
Herderz
- Victor II
- Posts: 283
- Joined: Sat Oct 10, 2020 6:39 pm
- Personal Text: Clockman
- Location: Elizabethtown, KY
Re: Columbia Grafonola Tabletop Barn Find and info on its restoration
Dzavracky, thank you, thank you. This is what I have been looking for. Thanks for putting in the scale, I know how to convert that to any piece in the pic. I know that the pics are from a standup model but at lease I know the thinking behind it and don't think that there would be a difference. Time will tell as I make each piece and put them together to see if I was on the right path. The only question is are the louvers on the machine three inch top to bottom, It does not matter how long just height and that is for the pivot points for the louvers
-
dzavracky
- Victor IV
- Posts: 1558
- Joined: Fri Oct 25, 2019 11:37 pm
- Personal Text: college collector
- Location: Knoxville Tennessee
- Contact:
Re: Columbia Grafonola Tabletop Barn Find and info on its restoration
The bottom louvre is 3 13/16” tall. The thickness at the top end is ⅛”. In the middle of the louvre (31/16” ish from either end) the thickness is 7/16”. And at the other end, the thickness is ⅜”. Hopefully these measurements will help will the tapering on the back sides. Each front side is flat. Both top and bottom edges are rounded. The center of the holes on the sides of the louvres are 1 ⅞” from each end, and is set back ⅜” from the FRONT of the louvre. Meaning it’s 1/16” from the backside of the slat. The hole is ⅛” in diameter.
Now for the top louvre it seems is 3 ¾” tall…. But maybe I am just off by 1/16”  . Except on the front side, it goes up 3 9/16” before the horizontal cut. The hight of the set back part is 3/16” and is cut ¼” back from the front of the slat. It seems to be 3/32” thick, and is slightly tapered at the top.
Hopefully these measurements make sense and will be helpful for you ! I am attaching a hand drawn picture as well to help clarify
David
Now for the top louvre it seems is 3 ¾” tall…. But maybe I am just off by 1/16”
Hopefully these measurements make sense and will be helpful for you ! I am attaching a hand drawn picture as well to help clarify
David
- Attachments
-
-
-
-