Victor I motor type CM motor - spring removal (updated)

Share your phonograph repair & restoration techniques here
User avatar
Roaring20s
Victor V
Posts: 2766
Joined: Wed Jun 13, 2012 1:55 am
Personal Text: Those who were seen dancing were thought insane by those who could not hear the music. Nietzsche
Location: Tucson, AZ

Victor I motor type CM motor - spring removal (updated)

Post by Roaring20s »

I just took apart and reassembled a VV-VI motor with ease.

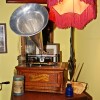
My current project is servicing this Victor I Motor Type CM motor.

From the awesome reference material at https://www.antiquephono.org/victorvict ... ld-braker/ by Harold Baker, his Victor/Victrola Motor Identification guide says this motor was used in some Victor O as-well-as some Victor I machines.

:coffee:
Who here has actually removed the spring barrel from a CM motor? This has turned out to be me. :)

I have attached a photo of both motors. The VV-VI motor uses a collar with a simple set screw to hold the shaft in place. This CM uses a collar that is pinned and will need to be tapped out. Any advice before I mess with it?

Also, does the spring have the same simple slip in attachment as the VV-VI does? NO
Or will it need to be fiddled with to be unhooked / hooked? NO

I do see a second way to take it apart by removing the stanchion, but it has more steps and a different pin to be tapped out.
This is the only way to remove the spring, See my next post!

Thanks,
James.
J and CM motors.png
Last edited by Roaring20s on Wed Oct 09, 2019 4:13 pm, edited 2 times in total.

User avatar
alang
VTLA
Posts: 3116
Joined: Thu Aug 19, 2010 9:36 am
Personal Text: TMF Moderator
Location: Delaware

Re: Victor I motor type CM, advice requested...

Post by alang »

Hi James,
I worked on several motors with that tapered pin. It really is no big problem, except that it is tapered and usually the hole on one side is slightly larger than on the other side. You need to tap it out in direction of the larger hole of course and insert there as well. I do not remember any particular difficulties with the spring, but don't remember if it has pear shaped holes or was bent as hooks.

Good luck!
Andreas

User avatar
Inigo
Victor Monarch
Posts: 4478
Joined: Mon Dec 18, 2017 1:51 am
Personal Text: Keep'em well oiled
Location: Madrid, Spain
Contact:

Re: Victor I motor type CM, advice requested...

Post by Inigo »

The rivet on the barrel indicates a pear shaped hole. My small similar hmv one and two spring motors have also inner pear shaped holes, but it's not difficult at all to insert the arbour nor to engage the spring.
The tapered pins: observe it well before extracting. The hole with the wider "head" in my case has a narrow chamfered mouth. The narrow end is a simple cylindrical hole, no chamfer around. The pin must be extracted by tapping on the narrow end (no chamfer), and reinserted tapping on the wider end (chamfered hole).
Inigo

User avatar
Roaring20s
Victor V
Posts: 2766
Joined: Wed Jun 13, 2012 1:55 am
Personal Text: Those who were seen dancing were thought insane by those who could not hear the music. Nietzsche
Location: Tucson, AZ

Re: Victor I motor type CM, advice requested...

Post by Roaring20s »

alang wrote: I worked on several motors with that tapered pin. It really is no big problem.
The pins are not the type that stick out a little. I always get queasy with these flush to the surface types. I'll tread lightly.
Inigo wrote:...but it's not difficult at all to insert the arbour nor to engage the spring..
Does the spring on this specific barrel have an arbor sleeve at the center of the spring like the VV-VI has? NO
Does the winding shaft simply passes through the center sleeve. NO

James.
Last edited by Roaring20s on Wed Oct 09, 2019 2:42 pm, edited 1 time in total.

User avatar
alang
VTLA
Posts: 3116
Joined: Thu Aug 19, 2010 9:36 am
Personal Text: TMF Moderator
Location: Delaware

Re: Victor I motor type CM, advice requested...

Post by alang »

Roaring20s wrote: Does the spring on this specific barrel have an arbor sleeve at the center of the spring like the VV-VI has? Where the winding shaft simply passes through the center sleeve. (I'll see if I can find a photo)

James.
I don't think this type motor has an arbor sleeve, but I could be wrong.

Andreas

User avatar
Roaring20s
Victor V
Posts: 2766
Joined: Wed Jun 13, 2012 1:55 am
Personal Text: Those who were seen dancing were thought insane by those who could not hear the music. Nietzsche
Location: Tucson, AZ

Re: Victor I motor type CM, advice requested...

Post by Roaring20s »

Progress was made today. I was able to determine the end to tap out. That gear is now off the shaft!

Next will be the ratchet gear on the opposite side of he stanchion. That is also pinned in place.

These older motors are not as friendly as the few later types I've tackled. :coffee:

James.

Update - The ratchet gear pin is out!!

Now to try and unhook the shaft from the spring without removing the stanchion.

This option will not be of use to remove the spring! No need to remove these pins! There is no short-cut here... read on...

User avatar
Roaring20s
Victor V
Posts: 2766
Joined: Wed Jun 13, 2012 1:55 am
Personal Text: Those who were seen dancing were thought insane by those who could not hear the music. Nietzsche
Location: Tucson, AZ

Re: Victor I motor type CM motor - spring removal (updated)

Post by Roaring20s »

Here we go ...

NOTE: Remember to fully un-wind the tension from the spring before working on any motor.

CM motor.png
NOTE: (B) sits higher than (D) and must be removed.

Here are the steps to get at this mainspring…

(A) Remove the governor,

(A1) by loosening the set-screw and sliding the pin to the left, tighten set-screw leaving both in its stanchion.

(B) Remove the brake,
(B1) by unscrewing the tiny set-screw (don’t loose it) and tapping out the pin holding the rod. Firmly hold the brake and spring while working it off the rod. After the rod is out, re-assemble the brake and place it in your parts cup to keep screw and spring safe.

(C) Remove the winding shaft,
(C1) by tapping out both pins. After pulling (C) out, re-assemble the unit and place it in your parts cup to keep the pins safe.

(D) Remove the stanchion, by removing the two screws on the underside of the motor chassis. Now the stanchion with the attached spring barrel can slide out.

To remove the cover from the barrel, tap on the winding shaft from the brass gear side until the cover pops out. Then you can unhook it from the spring.

See following photo of disassembled parts. Note that the winding shaft is a one piece unit and this is the only way to remove it. Also note that unseen in the photo, there is a washer between the spring and the cup of the barrel. No washer between the spring and spring barrel cover.
Success.JPG
That’s all folks!

James
:D

User avatar
fran604g
Victor VI
Posts: 3992
Joined: Mon Mar 04, 2013 2:22 pm
Personal Text: I'm Feeling Cranky
Location: Hemlock, NY

Re: Victor I motor type CM motor - spring removal (updated)

Post by fran604g »

Thanks for the wonderful tutorial James! Nice work.

Fran
Francis; "i" for him, "e" for her
"Even a blind squirrel finds a nut once in a while" - the unappreciative supervisor.

jboger
Victor IV
Posts: 1214
Joined: Tue Jun 24, 2014 10:12 pm

Re: Victor I motor type CM motor - spring removal (updated)

Post by jboger »

I don't see the brake pad assembly that makes contact with the governor on your CM motor. Having gone through this exercise recently, I don't think you can simply pull out the governor unless you deal with the brake pad assembly first. Loosening the two pivots on either end of the governor doesn't get you there.

User avatar
Roaring20s
Victor V
Posts: 2766
Joined: Wed Jun 13, 2012 1:55 am
Personal Text: Those who were seen dancing were thought insane by those who could not hear the music. Nietzsche
Location: Tucson, AZ

Re: Victor I motor type CM motor - spring removal (updated)

Post by Roaring20s »

This may address your post. :coffee:

The brake pad is attached to the rod marked "B" in the photo above.
You can also see it re-attached to the rod in the pink bowl.

To the best of my memory, after loosening "A" and moving "A1" to the left, the governor will be free. You may need to rotate "B" to the left in order to lay the brake pad horizontal to the bedplate, making it easier for the governor disc to pass over the pad.

James.

Post Reply