Turntable Felt Restoration
Posted: Sat Jan 30, 2010 5:09 pm
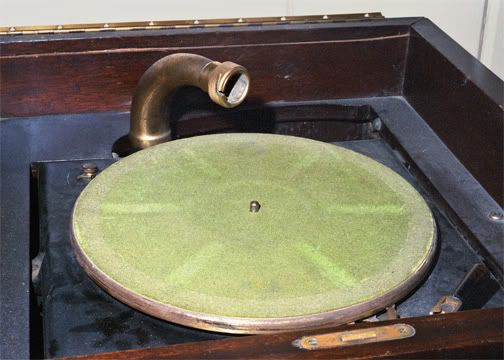
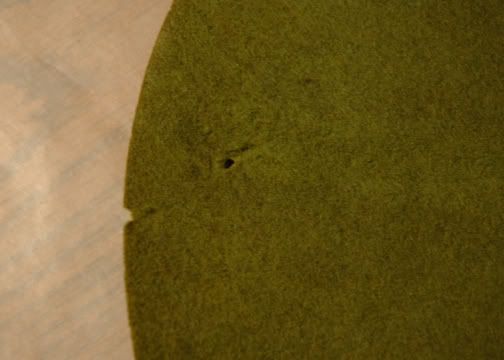
I don’t like using reproduction stuff if I can use the original. Sometimes I go to greater lengths than I should. I’m not sure that this isn’t one of those cases, but the results looked pretty good to me. My C-19 felt had moth holes and gouges, but I really liked the original color. It took a couple of evenings to accomplish.
Here’s what I did:
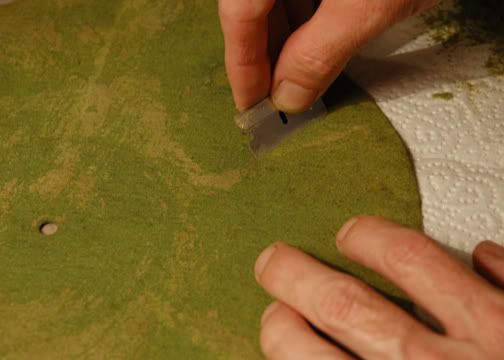
First, my tool of choice is the single edge razor blade. It’s the best all-purpose tool known to humankind (in my opinion). The C-19 felt was already pretty loose, so it was relatively easy to get the blade under there to take the rest of it off. I just took it slow, and it came off in one piece.
Next, I washed it in Naptha. I did that with lots of ventilation. (Remember Naptha is also used as lighter fluid, so don’t smoke around it - or moth holes will be the least of your problems.) It was a lot cleaner, but the discolorations (where the holes in the turntable were), didn’t go away. I decided I could live with those. I laid the felt out on a flat surface to dry overnight.
After drying, I brought it in and used the blade to take off the excess glue so that it would lay flat on the turntable when re-attached. While I was doing that, I harvested some clean fiber from the backside of the felt. This is the material that I ended up using to patch in the moth holes. I used lots of wax paper as my work surface. (The glue won’t stick to it, well, not much.)
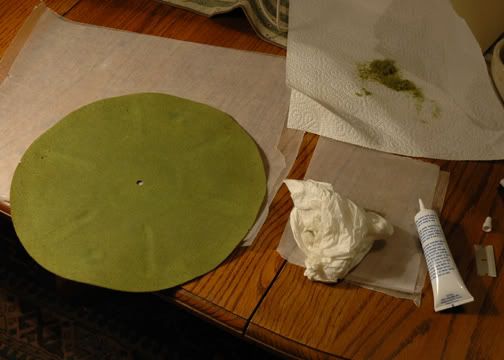
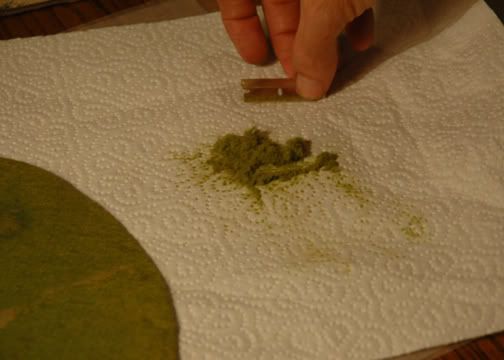
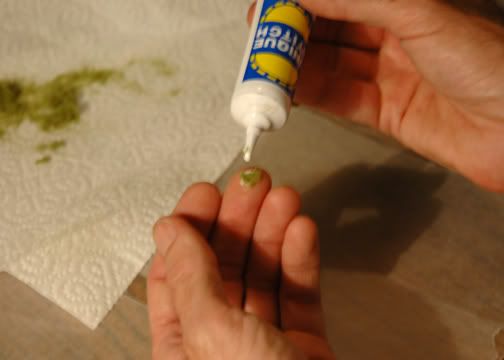
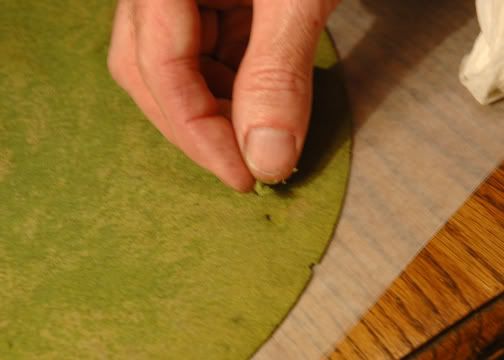
I used tacking glue that I got from Jo-Anne Fabrics. I think it was “Unique Stitch” or something like that. Initially, I worked on the back side to fill in the holes. I took a pinch of fiber and mixed it with the tacking glue to make a kind of felt spackle. I used my fingernail to tuck it in and smooth it out. I flipped it over and worked on the top side (the pretty side). I added a little tacking glue on top and pressed more loose fibers on to give a dry top surface of fiber. Once I was done, I let it dry overnight sandwiched in wax paper under a slightly weighted flat board. (I had to find one big enough to cover the complete surface.)

If I recall correctly, one or two of the patches had soaked a bit much glue and became rather hard and darkened after drying. I repeated the trick of lightly gluing the top of those parts with glue and reapplying more fibers.
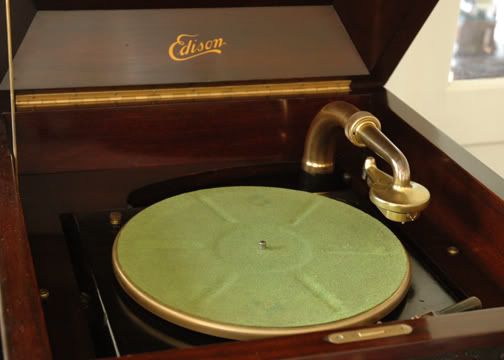
I re-attached the felt with the tacking glue, rather than shellac. I’ve always had a hard time using shellac for this as it always ends up soaking up too much shellac in some areas and spoiling the felt and not gluing down other areas. Perhaps others have had better luck.
I don't usually look this goofy:

Before and After:
Here’s what I did:
First, my tool of choice is the single edge razor blade. It’s the best all-purpose tool known to humankind (in my opinion). The C-19 felt was already pretty loose, so it was relatively easy to get the blade under there to take the rest of it off. I just took it slow, and it came off in one piece.
Next, I washed it in Naptha. I did that with lots of ventilation. (Remember Naptha is also used as lighter fluid, so don’t smoke around it - or moth holes will be the least of your problems.) It was a lot cleaner, but the discolorations (where the holes in the turntable were), didn’t go away. I decided I could live with those. I laid the felt out on a flat surface to dry overnight.
After drying, I brought it in and used the blade to take off the excess glue so that it would lay flat on the turntable when re-attached. While I was doing that, I harvested some clean fiber from the backside of the felt. This is the material that I ended up using to patch in the moth holes. I used lots of wax paper as my work surface. (The glue won’t stick to it, well, not much.)
I used tacking glue that I got from Jo-Anne Fabrics. I think it was “Unique Stitch” or something like that. Initially, I worked on the back side to fill in the holes. I took a pinch of fiber and mixed it with the tacking glue to make a kind of felt spackle. I used my fingernail to tuck it in and smooth it out. I flipped it over and worked on the top side (the pretty side). I added a little tacking glue on top and pressed more loose fibers on to give a dry top surface of fiber. Once I was done, I let it dry overnight sandwiched in wax paper under a slightly weighted flat board. (I had to find one big enough to cover the complete surface.)
If I recall correctly, one or two of the patches had soaked a bit much glue and became rather hard and darkened after drying. I repeated the trick of lightly gluing the top of those parts with glue and reapplying more fibers.
I re-attached the felt with the tacking glue, rather than shellac. I’ve always had a hard time using shellac for this as it always ends up soaking up too much shellac in some areas and spoiling the felt and not gluing down other areas. Perhaps others have had better luck.
I don't usually look this goofy:
Before and After: