Page 1 of 1
WANTED: WIRING DIAGRAM
Posted: Mon Sep 11, 2023 12:19 pm
by erunltd
Does anyone have a wiring diagram for the Endless Fairy Lamp which has a cartridge on-off switch?
I am particulalry interested in how the power cord to the motor ties into the power to the lights.
Thx if you have any info on this.
Re: WANTED: WIRING DIAGRAM
Posted: Tue Sep 12, 2023 7:54 pm
by Curt A
I have restored two of these 10 or more years ago and have never found a manual or wiring diagram, though one might exist. If I remember correctly, the motor switch is the lower ring on the lamp arm and is wired separately from the lamp switch and connected to the power cord. The motor can be run with or without the lights and the lights can be powered without the turntable being on. The volume control ring is on the tonearm stanchion and operates like a choke valve on an old carburetor - turn it one way and it opens, the other way and it closes.
You will need to disassemble the lamp arm by removing several set screws that hold the switches and the entire assembly inside the arm. I replaced the crude wood switches with modern rotary switches modified to fit into plastic conduit sleeves. The original factory switches were just crudely made from rectangular brass blocks that rotated between two brass leaves that created a contact (and a large spark) when rotated, mounted to a round wood piece.
I'm not a fan of sketchy wiring, so I modified them. I always thought that their scarcity was due to burning up in the houses they burned down. Imagine a spark in a house with gas fixtures and a small leak...

Re: WANTED: WIRING DIAGRAM
Posted: Tue Sep 12, 2023 7:57 pm
by Curt A
By the way, that appears to be a very nice example - congrats.
Re: WANTED: WIRING DIAGRAM
Posted: Tue Sep 12, 2023 8:02 pm
by Curt A
Here is an ad from 1920:
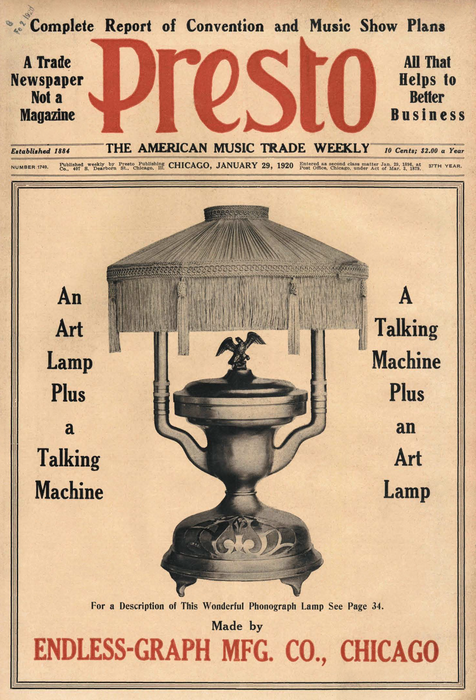
- Fairy Phonograph Lamp Ad_PRESTO-1920_crop.png (542.74 KiB) Viewed 744 times
Re: WANTED: WIRING DIAGRAM
Posted: Tue Sep 12, 2023 8:06 pm
by Curt A
As a reference, here is my Fairy Lamp, Before (when I got it) and After complete restoration:
Re: WANTED: WIRING DIAGRAM
Posted: Tue Sep 12, 2023 8:08 pm
by Curt A
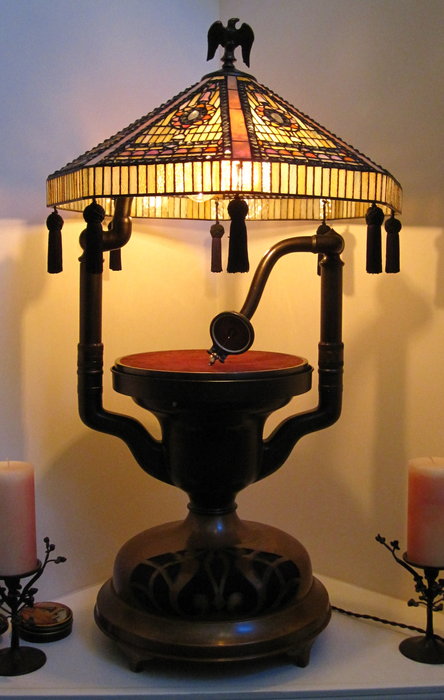
- Fairy 2.JPG (72.12 KiB) Viewed 743 times
Re: WANTED: WIRING DIAGRAM
Posted: Tue Sep 12, 2023 8:56 pm
by Curt A
Now, to answer your first question - how to connect the wiring.
Do you have basic knowledge of electrical wiring? Black - hot wire, White - neutral wire
Switch - breaks electrical current coming through the black wire (on a switch the copper colored connections are hot and the silver are neutral). On plugs the large prong is neutral and connected to the ribbed half of a lamp cord. Hot is the small prong connected to the smooth half of the lamp cord.
Without knowing how much knowledge you have, I hesitate giving advice...
This video explains how to wire two lights with separate switches connected to one input power source (cord). It is basically what you need to do to connect your lamp separately from the motor using one power cord...
https://www.youtube.com/watch?v=mxbaqegYxBU
Pay attention around the 5:40 mark on the video.
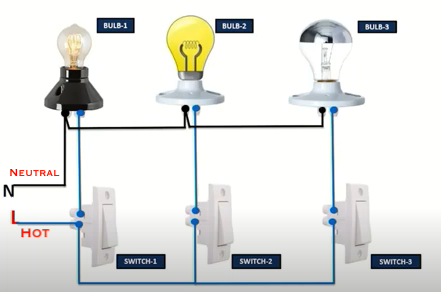
- Screenshot 2023-09-12 at 8.23.06 PM.png (71.77 KiB) Viewed 724 times
Re: WANTED: WIRING DIAGRAM
Posted: Tue Sep 12, 2023 10:34 pm
by erunltd
Curt . . .
Thanks for all the info you provided. I do have some electrical experience as I have
rewired many cluster socket lamps. The old dual lever control cartridge in the
electrical side of the arms seems to be in excellent condition.
I have a pretty good idea as to what needs to be done. The old wiring was a
fire waiting to happen. The motor on the unit I picked up is in great shape and
operate smoothly. I rebuilt the original reproducer. The body is my next
project and then rewiring. The photo I used is not my lamp. Mine should look
like that when done but it will be polished copper and brass.
Thanks again, Harry
Re: WANTED: WIRING DIAGRAM
Posted: Wed Sep 13, 2023 8:05 am
by Curt A
Let us know how you are progressing. Maybe some pics of your machine in its current state...
One more thing... if you want to restore the patina to your brass and copper pieces after polishing, mix copper sulfate powder with water and wash the exterior with it. It will give a bronze look like an aged penny...