this week's Amberola 1-A progress photo

Discussions on Talking Machines & Accessories
Post Reply
User avatar
MicaMonster
Victor III
Posts: 847
Joined: Sat Feb 28, 2009 12:52 pm
Personal Text: Never Settled
Location: Rochester, NY
Contact:

this week's Amberola 1-A progress photo

Post by MicaMonster »

Image

Drawers refinished and installed, back door and lock, hinges, hardware. Shown fitting replacement front cabinet door (original was lost to history).

Image

Interior grilles also painstakingly stripped, and refinished.
-Antique Phonograph Reproducer Restorer-
http://www.EdisonDiamondDisc.com
Taming Orthophonics Daily!

gramophoneshane
Victor VI
Posts: 3463
Joined: Wed Jan 07, 2009 3:21 pm

Re: this week's Amberola 1-A progress photo

Post by gramophoneshane »

Gee it's coming along nicely Wyatt. As much as we all like an original finish, I cant help but love the look of Mahogany Edisons with a new shellac finish. It really seems to bring out the grain & rich colour so well.
You must be very happy with the way it's shaping up so far. It's going to be a spectacular machine when you've finished.

User avatar
Valecnik
Victor VI
Posts: 3869
Joined: Sat Jan 10, 2009 3:28 pm
Personal Text: Edison Records - Close your eyes and see if the artist does not actually seem to be before you.
Location: Česká Republika
Contact:

Re: this week's Amberola 1-A progress photo

Post by Valecnik »

Press on Wyatt. Looking forward to see many detailed pictures of the results in the Edison sections of "Featured Phonograph". bruce

JohnM
Victor VI
Posts: 3144
Joined: Fri Jan 09, 2009 2:47 am
Location: Jerome, Arizona
Contact:

Re: this week's Amberola 1-A progress photo

Post by JohnM »

Wyatt --
Tell us about how you repaired the mouse hole in the drawer.

John M
"All of us have a place in history. Mine is clouds." Richard Brautigan

User avatar
WDC
Victor IV
Posts: 1017
Joined: Thu Jan 08, 2009 5:07 am
Location: Germany
Contact:

Re: this week's Amberola 1-A progress photo

Post by WDC »

A stunning job Wyatt. Did you apply the shellac coating with a brush or something else?

Kirkwood
Victor II
Posts: 391
Joined: Sat Jan 17, 2009 4:17 pm

Re: this week's Amberola 1-A progress photo

Post by Kirkwood »

Looks great so far! I really have come to like working with the shellac, now that I know a bit more about it. How many coats are on here so far? The finish has a nice rich tone to it, it has depth. Glad you took the time to post those "before" pics---makes the "so far" pics that much more remarkable. Keep up the good work!

User avatar
MicaMonster
Victor III
Posts: 847
Joined: Sat Feb 28, 2009 12:52 pm
Personal Text: Never Settled
Location: Rochester, NY
Contact:

Re: this week's Amberola 1-A progress photo

Post by MicaMonster »

JohnM wrote:Wyatt --
Tell us about how you repaired the mouse hole in the drawer.

John M
Wasn't pleasant. :) Had to angle cut the existing wood and glue in two patch pieces, then carve them back into the shape of the missing wood. Then, glued an old piece of veneer over the repair, and continued refinishing. I did not want to put a new piece of veneer over the entire drawer face because it would disrupt the original look of the machine. Granted, there are many remaining tiny bumps and irregularities in the cabinet woodwork, but it is old, and it needs to have a certain level of imperfectness in my eyes. If it was "sterilized," I feel I would have failed in restoring it.

All my restorations are reversible. This means that I use shellac, and old methods. Urethane and lacquer restorations are a bizzotch to "go back on," or continue. So, in the future if I want to add more shellac, it will not be a problem. Same applies if I want to go back and improve the look of anything (literally) on the cabinet. Shellac is easy to work with.

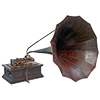
Shown with 5 thick coats of shellac. I let my shellac sit a while, to allow some of the alcohol to evaporate. Makes it easier to apply, reduces dripping, and really creates a nice crystal deep finish. Nothing beats shellac.

What remains:

-detailing of bedplate, and mechanical reassembly
-wood graining of horn and elbow
-restoration of original lid decal
-refinishing of lid

And, um, enjoying it!

I have the 4-minute Model L (fishtail) ready to go on the machine, and also have a Model M (2/4 minute) to try as well. 2-minute records sound amazing on a 1-A.

Wyatt
-Antique Phonograph Reproducer Restorer-
http://www.EdisonDiamondDisc.com
Taming Orthophonics Daily!

User avatar
Valecnik
Victor VI
Posts: 3869
Joined: Sat Jan 10, 2009 3:28 pm
Personal Text: Edison Records - Close your eyes and see if the artist does not actually seem to be before you.
Location: Česká Republika
Contact:

Re: this week's Amberola 1-A progress photo

Post by Valecnik »

Hi Wyatt, What about the fish-tail L and M? Will you, did you need to re-oxidise them or were they okay?

Regards, Bruce

User avatar
B.B.B
Victor I
Posts: 160
Joined: Thu Jan 15, 2009 5:02 am
Location: In the land of Pork & Bergman

Re: this week's Amberola 1-A progress photo

Post by B.B.B »

You really brought back the beauty of the wood!

Could you tell us some more of your shellac secrets, how do you apply it to the wood?
Searching for The Sound

Lenoirstreetguy
Victor IV
Posts: 1183
Joined: Thu Jan 08, 2009 3:43 pm
Location: Toronto, Ontario

Re: this week's Amberola 1-A progress photo

Post by Lenoirstreetguy »

Wyatt...I love the pics of this project! Keep them coming. The Youtube vid once it's finished will be great!
J

Post Reply