![[The Talking Machine Forum - For All Antique Phonographs & Recordings]](/styles/we_universal/theme/images/the_talking_machine_forum.png)

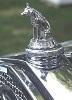
Here is a picture from the seller, probably the best shot of the top of the bedplate before cleaning.
Restoration: Edison Standard Model A #S169852
-
stevenhman
- Victor I
- Posts: 124
- Joined: Fri May 06, 2016 1:49 am
- Location: Raleigh, NC
Restoration: Edison Standard Model A #S169852
When I got this machine, 90%+ of the striping was gone and the logo on the bedplate had seen better days. The gear train is noisy and the spring was very weak and could barely play 1.5 records before slowing down.
Here is a picture from the seller, probably the best shot of the top of the bedplate before cleaning. Once it got to me, the case & banner decal seemed to be in very nice shape. Aside from a couple of white paint marks that wouldn't come off. I liked the look of the case and only ended up cleaning it and giving it several coats of paste wax. I'll post pictures of it cleaned & lightly polished once I'm finished. I wanted to get this post up before we had company over. I'll post more actual restoration stuff later!
Here is a picture from the seller, probably the best shot of the top of the bedplate before cleaning. Once it got to me, the case & banner decal seemed to be in very nice shape. Aside from a couple of white paint marks that wouldn't come off. I liked the look of the case and only ended up cleaning it and giving it several coats of paste wax. I'll post pictures of it cleaned & lightly polished once I'm finished. I wanted to get this post up before we had company over. I'll post more actual restoration stuff later!
Last edited by stevenhman on Fri Jul 15, 2016 12:50 am, edited 1 time in total.
-
Dave D
- Victor IV
- Posts: 1329
- Joined: Wed Aug 01, 2012 8:43 pm
- Location: Port Huron, MI
Re: Restoration: Edison Standard Model A #S169852
I look forward to seeing the finished product!
Dave
Dave
-
stevenhman
- Victor I
- Posts: 124
- Joined: Fri May 06, 2016 1:49 am
- Location: Raleigh, NC
Re: Restoration: Edison Standard Model A #S169852
Thanks Dave!
I tried cleaning up the topworks after it had been stripped of gears etc. with Goop (the non-pumice Gojo mentioned in many threads). By doing so, I think I uncovered a touch-up job from sometime in the nebulous past. I was afraid I had somehow removed the original asphaltum paint, but after dealing with removing the rest of the confounded stuff I feel somewhat confident that it was indeed touched up.
As you can see, the result made me think that this would be a good candidate to try my hand at stripping and refinishing the bedplate.
Citristrip had worked well in the past to remove paint/finishes so I tried that. After multiple applications over several days I concluded that it wasn't going to work.
I saw a thread about someone using drain cleaner that contains 'caustic' (I'm guessing it's lye). So I tried that and yet again another failure. I'm not sure if I got the wrong brand, but I soaked it in varying concentrations of solution for 6+ hours.
Then I got a cheap sandblasting gun off of Amazon. I used soda at first, but it wasn't really removing much of the asphaltum. I got a bag of play sand from the home center and several sweaty clogged nozzles later I ended up sifting the finer particles I wanted to use out and work went well after that. Until my air compressor broke.
I didn't have a proper face shield so the welding mask would have to do. Thankfully it just barely fit over my respirator so eventually, covered in sweaty sand, I ended up with this!
I tried cleaning up the topworks after it had been stripped of gears etc. with Goop (the non-pumice Gojo mentioned in many threads). By doing so, I think I uncovered a touch-up job from sometime in the nebulous past. I was afraid I had somehow removed the original asphaltum paint, but after dealing with removing the rest of the confounded stuff I feel somewhat confident that it was indeed touched up.
As you can see, the result made me think that this would be a good candidate to try my hand at stripping and refinishing the bedplate.
I saw a thread about someone using drain cleaner that contains 'caustic' (I'm guessing it's lye). So I tried that and yet again another failure. I'm not sure if I got the wrong brand, but I soaked it in varying concentrations of solution for 6+ hours.
Then I got a cheap sandblasting gun off of Amazon. I used soda at first, but it wasn't really removing much of the asphaltum. I got a bag of play sand from the home center and several sweaty clogged nozzles later I ended up sifting the finer particles I wanted to use out and work went well after that. Until my air compressor broke.
-
stevenhman
- Victor I
- Posts: 124
- Joined: Fri May 06, 2016 1:49 am
- Location: Raleigh, NC
Re: Restoration: Edison Standard Model A #S169852
With the bedplate being as sandblasted as it was going to get until I get around to ordering replacement parts for the compressor, I carried on with painting.
I used rolled up strips of paper (thanks The Compleat Talking Machine!, its so simple looking back but I was wondering how I was going to get all those holes taped up) to protect the machined holes and carried on with the next part of my adventure in doing everything the wrong way.
I strung it up outside to be primed and to put the first coat of paint on.
The combination of high humidity (thanks NC!) and spraying my semi-gloss black spray paint a bit too far away, left an awful pebbly texture.
After sanding, washing, drying, and re-painting (in my shop this time) I was plagued by floating cat hairs landing on the drying paint. I would then need to sand and paint again. Then I would realize I had missed the back part of one of the posts, etc. Once my can of paint was empty (and when I thought I was on my 'last' coat of paint) I went and used flat black instead of semi-gloss. In defense of what little intelligence I have it was in the wrong rack along with all the other semi-gloss black.
After a very careful sanding, I avoided cat hairs by banishing the shop cat, running the air filters for a couple of hours before, and immediately bringing the bedplate inside the house after the paint had been sprayed. I was extremely relieved to end up with this.
While not as smooth and defect hiding as new asphaltum paint would probably have been I was pleased with the result.
I used rolled up strips of paper (thanks The Compleat Talking Machine!, its so simple looking back but I was wondering how I was going to get all those holes taped up) to protect the machined holes and carried on with the next part of my adventure in doing everything the wrong way.
After a very careful sanding, I avoided cat hairs by banishing the shop cat, running the air filters for a couple of hours before, and immediately bringing the bedplate inside the house after the paint had been sprayed. I was extremely relieved to end up with this.
-
stevenhman
- Victor I
- Posts: 124
- Joined: Fri May 06, 2016 1:49 am
- Location: Raleigh, NC
Re: Restoration: Edison Standard Model A #S169852
I gave the poor patent plate a cleaning to remove the verdigris from the front and back. Painted it, and sanded down the front carefully to prepare it for silvering. Using the silvering powder was very fun and easy. It was great to see some instant results!
I had ordered a set of decals from Gregg Cline which had been waiting for me to stop messing up the painting. Some words of caution. Be careful when removing the decal set from the plastic bag, mine stuck a bit to the bag and some of the striping came off.
I got everything set up and ready to get to work.
I had carefully cut out the stripes using a ruler and brand new exacto blade. I then followed the directions provided, using Micro Sol & Set, to tediously set the decals. I had another great idea and used a cheap brush to manipulate the decals and was fighting with hairs coming loose and getting stuck on/under the decals. Don't worry I have a nicer set now!
I got into a nice rhythm listening to an audio book with headphones and got them down relatively quickly. I went straight from center of one screw hole to the other instead of a uniform distance from the edge. The Micro stuff really worked wonders for getting the fiddly little stripes adjusted. Doing the stripes & tufts first was good practice for getting the signature decal on. Of course I ended up getting it flipped over on itself while sliding it off the backing, but nothing a dozen muttered curse words and furious patience can't overcome.
I coated everything about 3 times in whichever Micro is the 2nd part. Looking at these pictures again is making me think that the signature is a bit too far to the right. Hopefully it will only bother me for half of eternity.
Here is a before and after of the bedplate pre-shellac. Showing more mistakes and fixing the motor to come!
I got everything set up and ready to get to work.
Here is a before and after of the bedplate pre-shellac. Showing more mistakes and fixing the motor to come!
-
martinola
- Victor III
- Posts: 963
- Joined: Wed Feb 11, 2009 1:30 pm
Re: Restoration: Edison Standard Model A #S169852
Looking good! All it will need is a good shellacing. (We all need a good shellacing from time to time...  )
)
Martin
Martin
-
Phono-Phan
- Victor V
- Posts: 2874
- Joined: Fri Apr 06, 2012 9:38 pm
- Location: Plover, WI
Re: Restoration: Edison Standard Model A #S169852
Very nice job!! I always enjoy seeing progress posts on projects and the different techniques used.
I would like to know more of how you used silver powder on the I.D. plate.
I would like to know more of how you used silver powder on the I.D. plate.
-
phonolady
- Victor I
- Posts: 151
- Joined: Mon Aug 26, 2013 2:21 pm
Re: Restoration: Edison Standard Model A #S169852
We second Ken's request about the silver powder. Where do you get it, what brand, will it work on all brass like tonearms, etc.
Thanks so much,
David & Lerria
Thanks so much,
David & Lerria
-
stevenhman
- Victor I
- Posts: 124
- Joined: Fri May 06, 2016 1:49 am
- Location: Raleigh, NC
Re: Restoration: Edison Standard Model A #S169852
phonolady wrote:We second Ken's request about the silver powder. Where do you get it, what brand, will it work on all brass like tonearms, etc.
Thanks so much,
David & Lerria
Thanks everyone - I think it would work on all uncoated brass.Phono-Phan wrote:Very nice job!! I always enjoy seeing progress posts on projects and the different techniques used.
I would like to know more of how you used silver powder on the I.D. plate.
I found it by searching for something like "Clock face[dial] silvering powder". I got mine from http://www.ebay.com/itm/Antique-silvere ... 451649010?
It came with very clear instructions. The 50g should be enough to do 5-10 patent plates.
From what I can remember this is what I did:
1) lightly sand the part to be silvered (brass only)
2) prepared one batch each of silvering powder & finishing powder (I used much less than was recommended, approx one normal spoonful of each, not leveled off). I put the silvering powder in an old medicine cup (like from the top of a NyQuil bottle). The finishing powder was left on its own separate wax paper.
3) rinse the part under very hot tap water for 30+ seconds to get it a bit wet, warm, and debris free
4) add a few drops of hot water into the cup with the silvering powder, mix with a toothpick and add more drops if needed until you get a clumpy paste
5) for the patent plate I just dumped a bit of the silvering powder paste onto the still wet/damp plate and began rubbing it in with my fingers. Once or twice I added some more fresh paste when the used paste became darker. All in all I probably only used about half of what I had prepared.
6) once I was pleased with the color, I rinsed it again under hot water until all the paste was removed
7) dry the silvered part very thoroughly with a clean cloth (old white undershirts are my go-to). Do not use any forced hot air
8) once dried, I moved on to the finishing powder, which apparently helps 'fix' the silver in place. I think you just rub the dry powder all over the silvered areas and wipe it off with a dry cloth
9) I then let the part sit overnight, the instructions said that the finish can change over that period and if needed use more finishing powder to even it out.
I may have missed a step or miscommunicated something so just use that to get an idea of the process. One or both of the powders is UV sensitive (any maybe oxygen as well).
-
stevenhman
- Victor I
- Posts: 124
- Joined: Fri May 06, 2016 1:49 am
- Location: Raleigh, NC
Re: Restoration: Edison Standard Model A #S169852
Haha, maybe if I were any good at it!martinola wrote:Looking good! All it will need is a good shellacing. (We all need a good shellacing from time to time...
Martin
I put on two thinned base coats of amber shellac. Since I didn't have my decent brushes yet the finish had marks all over from picking out bristles that got left behind. The next morning I noticed this haze on one corner tuft and the signature.
It looked perfectly blended in, but the I thought that the lacquer was a bit uneven so I'd just give it one more very gentle...
Pretty bummed about that. I'm considering what to do. Either just live with it, or try to remove it and put a new one down.