New amberola 30 project

Discussions on Talking Machines & Accessories
User avatar
NEFaurora
Victor IV
Posts: 1214
Joined: Sat Feb 20, 2010 7:02 pm
Personal Text: "A Phonograph in every home..."
Location: Melbourne, FL (Former New Yorker!)

Re: New amberola 30 project

Post by NEFaurora »

George Vollema can be reached at his website..

https://www.victroladoctor.com/

:o)

Tony K.

Edison Collector/Restorer

User avatar
NEFaurora
Victor IV
Posts: 1214
Joined: Sat Feb 20, 2010 7:02 pm
Personal Text: "A Phonograph in every home..."
Location: Melbourne, FL (Former New Yorker!)

Re: New amberola 30 project

Post by NEFaurora »

His governor springs are probably OK... The only time that I replace Amberola 30/50/75 Governor springs is when they are broken. They are pretty robust..even at 100+ years old....unless he can do it for under $40 bucks....I'd say don't waste your time unless they become a problem..

:o)

Tony K.

Edison Collector/Restorer

User avatar
dzavracky
Victor IV
Posts: 1613
Joined: Fri Oct 25, 2019 11:37 pm
Location: Washington DC

Re: New amberola 30 project

Post by dzavracky »

Alrighty update time again

I was able to get the governor apart tonight. I spent some time and bent the springs straight as much as I could. I put it back together and it’s workin great! I tried my best to count the rpm and it was slightly faster than 160 so I did good ;)

Only one complaint tho. It starts up so freakin slow :lol: Is this an indicator that I need a new spring?

So now I just need some parts and I think it’ll be ready to go! (I’ll be sending Wyatt my reproducer soon)

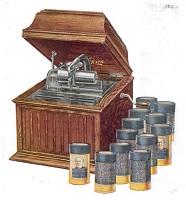
Oh and here is a picture of the lid. Replace the sheet or repair the veneer? I am going to Home Depot later this week for some spray paint, and there is a woodworking shop (called woodcraft) nearby. Would they have the right oak veneer? And then what’s the best stain/dye to getting the right amberola 30 color


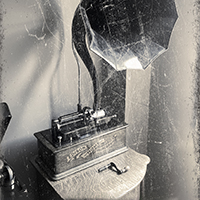
Here’s a video of the motor again (again it’s not this loud in person)


Thanks guys!
Attachments
C33AEF75-4D43-4ACD-8564-9B63E574C55F.jpeg
0A51CED4-347D-4697-8D09-B27F60382710.MOV
(4.98 MiB) Downloaded 503 times

User avatar
dzavracky
Victor IV
Posts: 1613
Joined: Fri Oct 25, 2019 11:37 pm
Location: Washington DC

Re: New amberola 30 project

Post by dzavracky »

Will this piece of veneer work? I received some wood parts from an old amberola awhile ago and I just remembered I had it.

The grain doesn’t quite look the same
Attachments
4BEFF19F-2215-4130-86B4-C425423AA2C1.jpeg
8B4A08F6-DE34-4753-A575-3CC3735F4EAA.jpeg

JerryVan
Victor Monarch Special
Posts: 6595
Joined: Mon Aug 24, 2009 3:08 pm
Location: Southeast MI

Re: New amberola 30 project

Post by JerryVan »

Happy to read of your success with the governor!

Your spare piece of veneer won't look good. It's not oak. Woodcraft stores usually have some very knowledgeable staff to help you. Take the lid with you and ask for their help in selecting a proper veneer. Pay close attention to the veneer thickness as well. If the veneer is too thin, you can shim it up by adding some paper under you veneer patch. Better to be a bit too high and sand it back down, than to be too thin and show a hollow spot.

With an Exacto knife and a straight edge, cut away the original veneer on either side of the missing piece, to form a sharp "V", (don't cut a rectangular patch, the end that will run perpendicular to the grain will look awful). Then, cut your veneer patch to the exact same "V" shape. Shim as needed, and glue in place. To glue, position your veneer patch in place, place a piece of wax paper over the patch, then place a flat, smooth block of wood over the wax paper/patch. Use a piece of wood large enough to cover the patch and at least 2" of the surrounding area. Place your clamp over the wood block and tighten. Don't get crazy with tightening the clamp. Nice and snug is all you need. You'll probably need to put a block of wood inside the lid to give you something for the other end of the clamp "bite" on. If so, protect the finish inside the lid.

After gluing, block sand the patched area to level off any differences in thickness between the patch and the surrounding area.

Looks like a Behlin SolarLux VanDyke brown might be a close stain match for you. Again, the Woodcraft people can probably help you there, since you'll have the lid in hand for comparison.

User avatar
dzavracky
Victor IV
Posts: 1613
Joined: Fri Oct 25, 2019 11:37 pm
Location: Washington DC

Re: New amberola 30 project

Post by dzavracky »

Sounds good Jerry!

I did some work on the finish tonight. It’s looking much better ;)

I made it through finals (thank God) so I’ll be headed to woodcraft tomorrow!
Attachments
5723DD88-7DA9-4CBA-87CC-7280B8AB95C1.jpeg
9505DCF4-6C06-4640-B12E-1AB768F4DBFC.jpeg

User avatar
dzavracky
Victor IV
Posts: 1613
Joined: Fri Oct 25, 2019 11:37 pm
Location: Washington DC

Re: New amberola 30 project

Post by dzavracky »

Update again:

Here is the current state of the machine :D Gonna finish the lid later maybe tonight

The veneer patch went really well. I’m going to stain it to match as best as I can tonight. Thanks for the great advice Jerry!

(The top of the lid is not done yet that’s why it looks bad) :? :lol:
Attachments
25AE6F7A-AFC5-4FA3-BD83-BE4866A6B4EA.jpeg
6843BDE8-1578-4D9E-83B2-7C4CEE5FF5E9.jpeg
09540FE1-CDD1-4568-961A-5B18E92AE47B.jpeg
D39D7AD1-AB78-4EE3-A90F-22230AFCA9A4.jpeg

JerryVan
Victor Monarch Special
Posts: 6595
Joined: Mon Aug 24, 2009 3:08 pm
Location: Southeast MI

Re: New amberola 30 project

Post by JerryVan »

Wow! Looks like you're doing a great job! The patch looks very good.

VanEpsFan1914
Victor VI
Posts: 3375
Joined: Fri Oct 06, 2017 11:39 am
Personal Text: I've got both kinds of music--classical & rag-time.
Location: South Carolina

Re: New amberola 30 project

Post by VanEpsFan1914 »

Quite a transformation! You literally went from a pile of parts, to a beautiful phonograph. A few more bits and pieces and it will be ready to play your four-minute celluloid records.

One piece you may wish to add (I think this is correct on the third series Amberolas) is the addition of a few dots of felt where the lid closes. I do not know the technical name for them. To do mine I went to eBay and bought a four-pack of the little brown dots that go on either an Orthophonic cabinet Victrola or on a later Edison DD machine.

Not sure what the original felt on yours was colored. It's a nice touch that helps as a shock absorber for the lid. I am not sure if they were there from the factory; mine looked like it had them originally but it could have had them added by a previous owner. The brown felt was chosen to match the brown on Edison DD's in the later part of production as my Amberola is a rather late third series.

Also, buy some tack bumpers. They are great--you literally tack them onto the bottom of the case in the holes where the old feet went and they don't fall off. (Remove lid & mechanism first and lay the whole case up side down on something solid--Tack bumpers done otherwise are tough to apply.)

One thing you may want to do is take the mandrel and all nickeled pieces off and give them a good polishing with a safe nickel polish and a soft cloth, the usual. The base of the mandrel, the gray ring, probably won't shine but the nickeled part will. Same for escutcheon, crank, lid stay, start lever and lift lever.

Looking like a nice machine--sure you'll be enjoying this one soon! It's been fun watching the success story unfold.

User avatar
dzavracky
Victor IV
Posts: 1613
Joined: Fri Oct 25, 2019 11:37 pm
Location: Washington DC

Re: New amberola 30 project

Post by dzavracky »

Thanks! I finished the lid tonight. Sadly the patch is fairly obvious, but I tried my best. For a first veneer patch I suppose it’s not so bad.

I just need a few parts and a reproducer rebuild and it’ll be running! Would these felt pads work? And should I glue them to the lid or where I have them in the picture?

Here’s some more pictures!
Attachments
image.jpg
image.jpg
It’s fairly obvious :(
image.jpg
image.jpg
image.jpg
image.jpg

Post Reply