VV-IX Restoration

Discussions on Talking Machines & Accessories
User avatar
antique1973
Victor IV
Posts: 1281
Joined: Mon Mar 22, 2010 3:30 am
Personal Text: Victor Z, Victrola 4-3

VV-IX Restoration

Post by antique1973 »

This one was rough when I found it as you can see. :o
It was stored away for many years in a garage and shared space
with a bird breeding biz. :lol:

I got it for $75 and it was mostly complete. I just had to add
a couple knobs and a needle cup which I swiped from my VV-100
until I can get replacements. The motor plays ok but needs
the usual R&R treatment which I will get to shortly.
There are a couple minor veneer chips that need repair also.
Overall I am pretty happy with the results. :D
Attachments
P6150002.JPG
P6150004.JPG
P6150005.JPG
P6150006.JPG
P6150007.JPG
P6150008.JPG
P6210004.JPG
P6210005.JPG
P6210006.JPG
P6210008.JPG

User avatar
antique1973
Victor IV
Posts: 1281
Joined: Mon Mar 22, 2010 3:30 am
Personal Text: Victor Z, Victrola 4-3

Re: VV-IX Restoration

Post by antique1973 »

Forgot a couple pics...including Nipper the dog's approval.
Attachments
P6210014.JPG
P6210010.JPG
P6210016.JPG

Tampa Don
Victor Jr
Posts: 37
Joined: Thu Jan 08, 2009 5:12 pm
Location: Tampa, Florida USA

Re: VV-IX Restoration

Post by Tampa Don »

Nice looking phono for only $75 invested! Care to share with us what you used to get such great results in your restoration?
Don

User avatar
Zeppy
Victor III
Posts: 706
Joined: Wed Jan 07, 2009 2:51 pm
Location: Gaithersburg, MD

Re: VV-IX Restoration

Post by Zeppy »

I'm curious about what you did with the underside of the lid. Would it be too much to impose for closer pictures? I have a machine waiting for restoration with some wear and tear on the inside of the lid that I'm still debating how to fix up, and you seem to have done a nice job on what appears to be worn, stained and nasty, and I can't tell what was done.

User avatar
antique1973
Victor IV
Posts: 1281
Joined: Mon Mar 22, 2010 3:30 am
Personal Text: Victor Z, Victrola 4-3

Re: VV-IX Restoration

Post by antique1973 »

Sorry I just realized I should have explained my methods. :)

Shined all nickel parts with 0000 steel wool and WD 40

Scrubbed all wood surfaces (under the lid as well) with 0000
steel wool and Kotton Klenser then wiped with clean rag. Note
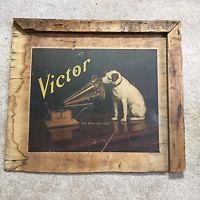
that I suspected there was some kind of stain over the decal
so the finish may have been more forgiving of using steel wool.
0000 is very fine so I think in most cases it is safe under
lid areas. Maybe Brad can elaborate on this issue better as
far as when its safe or not to use 0000 over the decal.

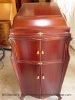
Applied Howards' mahogany restore-a-finish with 0000 steel wool
(gently) on all wood surfaces (including under the lid) then wiped clean.

Applied Howards's Feed and Wax treatment with a soft rag.

There is still some minor alligatoring in places but I decided its
subtle enough to let it be.

I will post some close up shots tomorrow. :)

User avatar
SignatureSeriesOwner
Victor II
Posts: 335
Joined: Tue Feb 23, 2010 9:35 pm
Personal Text: VV-XVII, VV-XVI, VV-107, VV-IX's....
Location: Surry, VA

Re: VV-IX Restoration

Post by SignatureSeriesOwner »

Your only mistake (IMO) was using #0000 AND WD-40.

I've polished a good many nickel and gold plated parts using just steel wool, and that works great. It looks like the arm could come out a bit better if just steel wool is used. Of course, that could just be the flash, and I'm by no means trying to insult you or your methods, but it's just a suggestion. :D
Saving America's Acoustical History, One Phonograph At A Time...

User avatar
antique1973
Victor IV
Posts: 1281
Joined: Mon Mar 22, 2010 3:30 am
Personal Text: Victor Z, Victrola 4-3

Re: VV-IX Restoration

Post by antique1973 »

SignatureSeriesOwner wrote:Your only mistake (IMO) was using #0000 AND WD-40.

I've polished a good many nickel and gold plated parts using just steel wool, and that works great. It looks like the arm could come out a bit better if just steel wool is used. Of course, that could just be the flash, and I'm by no means trying to insult you or your methods, but it's just a suggestion. :D

I actually tried to get that film off with just the steel wool first but it was'nt
working. Even with WD-40 its not 100 percent yet. I have had pretty good luck
with WD-40 as a cleaner for unidentified gunk in the past. I will try another go
at that "filmy" area on the tone arm with just 0000 to see if I get some improvement.

You did not insult me William, if I screw something up its your job to notify me before I do any more damage! :lol:

User avatar
SignatureSeriesOwner
Victor II
Posts: 335
Joined: Tue Feb 23, 2010 9:35 pm
Personal Text: VV-XVII, VV-XVI, VV-107, VV-IX's....
Location: Surry, VA

Re: VV-IX Restoration

Post by SignatureSeriesOwner »

I know this may sound crazy and other WILL cringe, but...


You want to know what to do (in most cases) when you come across an arm with a heavy "film" on it?


Scrub harder.

I've actually put a LOT of force on it before (don't go full blast on it though, try increasing the pressure slightly. you'll know if you begin to go too far.)

My Granada was like that. Did that, and it looks like new now, except for one small spot no one sees for the bracket. :D


Worked crazy-good on my Continentals front bumper too. :D
Saving America's Acoustical History, One Phonograph At A Time...

User avatar
antique1973
Victor IV
Posts: 1281
Joined: Mon Mar 22, 2010 3:30 am
Personal Text: Victor Z, Victrola 4-3

Re: VV-IX Restoration THIS POST IS IN ERROR, PLEASE DISGREGARD

Post by antique1973 »

Sorry,this was posted in error. Please see next post. Admin, delete this one
please if possible. Thanks.
Last edited by antique1973 on Wed Jun 23, 2010 7:50 pm, edited 1 time in total.

User avatar
antique1973
Victor IV
Posts: 1281
Joined: Mon Mar 22, 2010 3:30 am
Personal Text: Victor Z, Victrola 4-3

Re: VV-IX Restoration

Post by antique1973 »

SignatureSeriesOwner wrote:I know this may sound crazy and other WILL cringe, but...


You want to know what to do (in most cases) when you come across an arm with a heavy "film" on it?


Scrub harder.

I've actually put a LOT of force on it before (don't go full blast on it though, try increasing the pressure slightly. you'll know if you begin to go too far.)

My Granada was like that. Did that, and it looks like new now, except for one small spot no one sees for the bracket. :D


Worked crazy-good on my Continentals front bumper too. :D


I posted some more close up pics as requested of the lid and tonearm post
second treatment with 0000 steel wool.

I scrubbed it for about 40 minutes with no noticeable improvement. I am suspecting this is an early form of pitting perhaps. The plate on it says it was
made in Connecticut so its had quite a journey and my guess it was abused all
the way to California. I am cool with it for now, my next focus is the spring
work in the near future.
Attachments
P6230004.JPG
P6230012.JPG
P6230006.JPG
P6230013.JPG
P6230011.JPG
P6230007.JPG

Post Reply